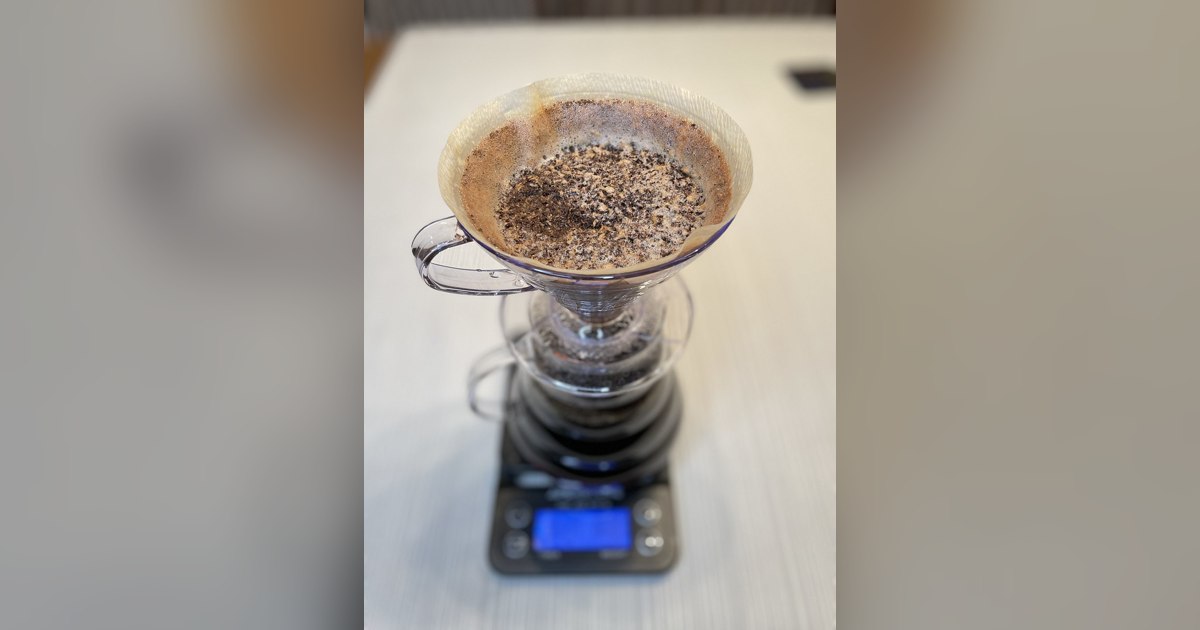
Image: markolaz via Flickr (CC BY 2.0). For illustrative purposes only — not the exact product reviewed.
Your First Pour-Over: A Step-by-Step Beginner’s Guide
You bought a dripper, a bag of whole beans, and a kettle. Now what? Pour-over coffee looks elegant on social media, but nobody tells you that the first attempt usually produces something between dishwater and battery acid. That's normal. This guide walks you through the entire process so your second cup is actually worth drinking.
What You Actually Need (and What You Don't)
The internet will tell you that pour-over requires seventeen pieces of specialised equipment. It doesn't. Here's the honest minimum:
- A dripper. The Hario V60 is the most popular starting point, but a Kalita Wave 185 is more forgiving if you're nervous about technique. Either works brilliantly.
- Matching paper filters. Every dripper uses its own shape. V60 takes cone filters. The Kalita uses flat-bottom wave filters.
- A burr grinder. Pre-ground coffee goes stale in days and you can't adjust the grind. Even a budget grinder like the Timemore C2 Max will transform your results.
- A kettle with a narrow spout. A regular kitchen kettle dumps water too fast. A gooseneck like the Fellow Stagg EKG or the more affordable Coffee Gator stovetop kettle gives you the control you need.
- A scale. Eyeballing doses is the number one reason beginners get inconsistent results. A simple kitchen scale with a timer is all you need.
- Fresh whole beans. Buy from a local roaster if you can. Look for a roast date on the bag, not just an expiry date. Beans are at their best between 7 and 30 days after roasting.
Things you do not need yet: a refractometer, a specialty water kit, or a $200 grinder. Those matter later, once you can taste the difference. Right now, focus on nailing the basics.
The Recipe: Your Starting Point
Every experienced brewer has a personalised recipe. You don't have one yet, so start here:
- Coffee: 15 grams (about one heaped tablespoon)
- Water: 250 grams (250 ml) at 92 to 96 degrees Celsius
- Grind: Medium. Think table salt, not sand and not sea salt
- Total brew time: 2 minutes 30 seconds to 3 minutes 30 seconds
That 1:16.7 ratio (coffee to water) is a widely used starting point. You'll adjust it later as your palate develops.
Step-by-Step: Your First Brew
Step 1: Heat Your Water
Bring your kettle to a boil, then let it sit for 30 to 45 seconds. If you have a variable-temperature kettle, set it to 93 °C. If you don't have a thermometer, waiting half a minute off the boil gets you close enough.
Step 2: Grind Your Beans
Weigh out 15 grams of whole beans on your scale and grind them. You're aiming for particles roughly the size of table salt. If your grinder has numbered settings, start in the middle of its range and adjust from there on your next brew.
Step 3: Rinse the Filter
Place the paper filter in the dripper, set it on your mug or carafe, and pour hot water through the empty filter until it's fully wet. This does two things: it washes out the papery taste and preheats your dripper. Discard the rinse water from your mug before you proceed.
Step 4: Add the Coffee and Level the Bed
Tip your ground coffee into the wet filter. Give the dripper a gentle shake to level the surface. A flat bed means water will flow through evenly. A lopsided bed means one side over-extracts while the other barely touches the water.
Step 5: The Bloom (0:00 to 0:45)
Start your timer and pour about 30 to 45 grams of water over the grounds in a slow, circular motion. You'll see the coffee puff up and bubble. That's carbon dioxide escaping from the freshly roasted beans. Wait 30 to 45 seconds. This "bloom" phase lets the gas escape so the rest of your water can actually reach the coffee instead of bouncing off a layer of CO2.
Step 6: The Main Pour (0:45 to 2:00)
Pour the remaining water in slow, concentric circles, starting from the centre and spiralling outward to about a centimetre from the filter's edge, then back to the centre. Keep the water level in the dripper roughly consistent. Don't flood it to the brim and don't let it drain completely between pours. Aim to finish adding all 250 grams of water by the 2:00 mark.
Step 7: Let It Drain (2:00 to 3:00+)
Once you've added all the water, let it drip through. Your target is a total brew time (from the first drop of bloom water) of about 2 minutes 30 seconds to 3 minutes 30 seconds. If it finishes much faster, your grind was probably too coarse. If it drags past 4 minutes, grind coarser next time.
Step 8: Taste and Adjust
Take a sip. If it tastes sharp, sour, or thin, the coffee is under-extracted: grind finer or pour slower next time. If it tastes harsh, bitter, or astringent, it's over-extracted: grind coarser or speed up your pour. Each brew teaches you something.
Common First-Timer Mistakes
- Skipping the bloom. Without it, trapped CO2 creates channels in the coffee bed and your extraction becomes wildly uneven.
- Pouring too fast. A fire hose of water pushes grounds aside and creates channels. Slow, controlled circles are the point of the gooseneck spout.
- Using boiling water. Straight off the boil is too hot for most coffees and will scald lighter roasts into bitterness.
- Not weighing the coffee. A "scoop" can vary by 5 grams depending on bean density. Use the scale.
- Expecting perfection. Your third cup will be dramatically better than your first. Your twentieth will surprise you. That progression is the whole point.
What to Upgrade First
After a few weeks of daily brewing, you'll start noticing things. Here's where your money makes the biggest difference, in order:
- Grinder. Moving from ceramic to steel burrs (see our grinder guide) delivers the single largest improvement in cup quality.
- Scale. Upgrading to a dedicated barista scale with 0.1g precision and a built-in timer makes your workflow faster and more consistent.
- Water. If your tap water tastes odd, it will make your coffee taste odd. Read our water chemistry guide when you're ready for that rabbit hole.